How to Refill a Vape Pod?

Azim Aleem
How to Refill a Vape Pod?Updated: 23 October 2026

Knowing how to refill a vape pod correctly helps prevent leaking, flooding and burnt coils. Compare the pod range and related items here:

Replacement pods

Vape pods 

Nic salts 

10ml starter e-liquids 

For more background: 

Guide to vape pods

Different types of vape pods 

What Is a Refillable Vape Pod?

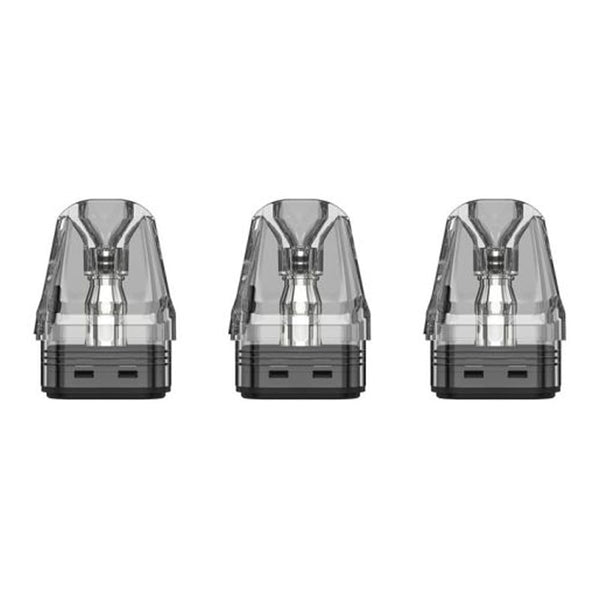
A refillable pod holds e-liquid, a coil and a wick. It connects to a rechargeable battery. Some coils are built into the pod; others are individually replaceable.

The fill port may sit below the mouthpiece, behind a side flap or underneath the cartridge. A sealed, prefilled pod is different: it is replaced when empty and should not be filled manually.

How to Refill a Vape Pod in Seven Steps

  • Confirm the pod is refillable: Check your device instructions and the recommended e-liquid ratio. 
  • Locate the fill port: Gently open the designated top, side or bottom seal, or remove the mouthpiece on a compatible top-fill pod.
  • Identify the correct hole. Insert the bottle nozzle into the liquid-filling opening, not the central airway or chimney (this will cause gurgling and spitback).
  • Fill slowly: Tilt the cartridge where helpful and add liquid to the fill line. Do not overfill. Where no line is marked, leave a small air gap to allow a natural seal to form, rather than filling to the brim.
  • Close the seal: Press the plug into place or snap the mouthpiece back securely. Check for trapped liquid and an uneven seal.
  • Wipe and prime: Clean external contacts with a dry, lint-free cloth. A brand-new or newly fitted coil needs to be primed for at least ten minutes. A routine top-up of an already wet wick normally does not require additional priming
  • Reassemble and check: Insert the pod securely, inspect for seepage and follow the permitted power setting. Stop if the device leaks onto electrical contacts or produces a persistent burnt taste.

Wash skin after spills and keep liquid away from children and pets.

Refill by Fill Type: Top, Side and Bottom

Filling method

Where to look

Main precaution

Top-fill, removable mouthpiece

Under the mouthpiece, usually beside the central airway

Use the dedicated filling hole and click the mouthpiece fully back on

Top-fill, hinged or covered port

Near the upper edge of the pod

Open only the specified cover and check it is shut afterwards

Side-fill

Silicone flap along the cartridge wall

Remove the pod if instructed and reseat the plug flush

Bottom-fill

Silicone stopper on the underside

Remove and orient the pod as the manual specifies; dry contacts before reinsertion

Device-Specific Refill Guides: XROS, Caliburn and Argus

Vaporesso XROS: 

For the commonly used top-fill XROS cartridges, remove the mouthpiece, put the bottle nozzle into the filling slot beside the central airway, fill carefully and replace the mouthpiece. Vaporesso's XROS user manual specifies five minutes for initial coil saturation; however, ten minutes saturation time would be beneficial.

Uwell Caliburn G3: 

The Caliburn G3's user manual advises users to remove the mouthpiece, fill through the dedicated opening rather than the airway, secure the mouthpiece and allow ten minutes after the first fill. Other Caliburn generations have different cartridges and instructions.

Voopoo Argus: 

Compatible Argus Top Fill V2 cartridges have an upper filling opening. Open the specified cap, fill slowly, close securely and allow a fresh coil to prime. See Voopoo's Argus cartridge guidance. 

Refillable Pod Examples

Refillable Pod ExamplesOXVA XLIM Top Fill V3 Replacement Pods

Popular 2ml refillable pods with integrated mesh coils. Available in 0.4ohm, 0.6ohm, 0.8ohm and 1.2ohm resistances for compatible XLIM devices, excluding XLIM C. Open the designated top-fill port rather than trying to remove the coil.

Oxva Xlim Top Fill Replacement Pods (Pack of 3)

Oxva Xlim Top Fill V3 Replacement Pods (Pack of 3)

£9.99 £14.99

Brand: OXVA

Buy Now

Geekvape Q Replacement Pods 

Geekvape’s 2ml top-fill cartridges with built-in coils for compatible Sonder Q and Wenax Q devices. Remove the specified top cap, fill through the liquid port and snap it back into place.

Geekvape Q Replacement Pod

Geekvape Q Replacement Pod (Pack of 3)

£8.99

Brand: Geek Vape

Buy Now

Aspire BP Stik Replacement Pod 

2ml bottom-fill pods using separately fitted Aspire BP coils. Open the silicone stopper underneath, refill carefully, close it fully and dry the exterior before reinserting. The compatible coil is available separately.

Aspire BP Stik Replacement Pod

Aspire BP Stik Replacement Pod

£3.99

Brand: Aspire

Buy Now

What E-Liquid Should You Use?

Liquid type Common device context Check before filling
50VG/50PG freebase Many lower-power MTL pods Permitted nicotine strength and coil resistance
50/50 nicotine salt Compatible low-power MTL cartridges Label strength and the specific pod's instructions
Moderately higher-VG liquid Selected adjustable pod systems Whether the wick and coil support thicker liquid
High-VG shortfill Usually compatible higher-output systems Avoid small pods that cannot wick thick liquid efficiently

Troubleshooting: Leaks, Flooding and Gurgling

Symptom Possible cause What to check
Leaking after a refill Overfilling, unseated seal, cracked cartridge or unsuitable liquid Check the fill level, stopper, casing and coil seating
Gurgling Liquid in the airflow, excess condensation or a flooded coil Remove the pod if permitted; wipe accessible areas and inspect the filling port
Spitting liquid Flooding, incorrect power or liquid in the chimney Stop using it, check filling technique and follow the coil instructions
Burnt taste Wick not primed, liquid too low, incompatible viscosity or worn coil Stop firing; check liquid and power, replacing a scorched coil or pod
No vapour Empty battery, poor contact or incompatible cartridge Check charge, dry contacts and the precise pod model

Do not dismantle sealed coils or use devices with liquid entering damaged electronics.

When Should You Replace the Pod?

Replace a fixed-coil cartridge if its burnt taste persists after checking the liquid and power, if flavour or output falls noticeably, or if its casing or seals are damaged. With a separate-coil cartridge, replace the coil first and retain the pod to be re-used. There is no fixed replacement deadline.

The UK limits regulated consumer nicotine e-liquid to 20mg/ml, refill bottles to 10ml and refillable tanks or pods to 2ml. The June 2025 single-use vape ban allows compliant rechargeable systems with replaceable prefilled pods, but not manual refilling of sealed cartridges.

Frequently Asked Questions

How do I refill a vape pod?

Locate the fill port, add e-liquid below the maximum level, close it securely and wipe the exterior. Prime a new coil for ten minutes before first use.

How much e-liquid should I put in a pod?

Follow the marked maximum and the manufacturer's guidance. For an unmarked reservoir, leave a small air pocket rather than filling it to the brim. UK regulated refillable pods have a maximum capacity of 2ml.

Why does my pod leak after refilling?

Common causes include overfilling, filling down the central opening, loose seals, damaged plastic, incorrectly seated coils and incompatible liquid viscosity. Inspect and replace damaged parts; do not keep using a leaking device.

How long should I wait before vaping after a refill?

A new coil generally needs the manufacturer's initial priming period, at least ten minutes. An existing saturated coil does not need to be primed again.

Can I refill a prefilled pod?

Absolutely not. These pods are sealed and are not designed to be refilled.

Final Checklist

Identify the fill port, match the liquid to the coil, keep an air gap, close the seal and allow new wicking material to saturate for ten minutes. Check for leaks before using the device and replace damaged pods. For advice about stopping smoking, contact an NHS Stop Smoking Service.

Sources and Further Reading

MHRA, E-cigarette consumer regulations

GOV.UK, Single-use vapes ban

Vaporesso, XROS user manual

Uwell, Caliburn G3 user manual

Voopoo, Argus maintenance guidance

Back to blog

Leave a comment

Please note, comments need to be approved before they are published.