


 The Hayati Pro Ultra 25000 is designed to offer a long-lasting vaping experience through a rechargeable battery and replaceable prefilled pod system. This design allows the user to continue using the same battery device while replacing the pod when the e-liquid or coil performance declines.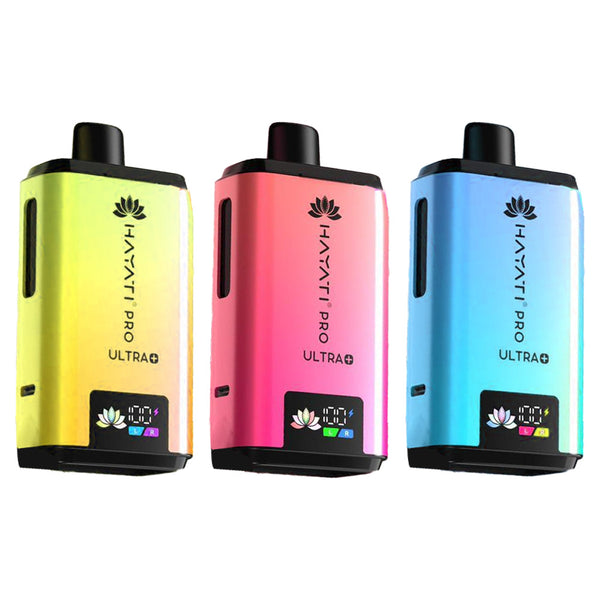
Hayati Pro Ultra Plus 25000 Prefilled Pod Kit
Brand:Hayati
Buy NowTroubleshooting Common Issues:
Why the Device May Not Produce Vapour:
One of the most common concerns is that the Haytai Pro Ultra does not produce vapour after setup. However, the issue is often associated with the pod setup.
Common causes include:
- Failing to remove protective transport seals or silicone plugs.
- The pod assembly is not being fully pressed or clicked into place.
- The 10ml refill container is failing to connect or feed properly.
- Blocked airflow channels at the base or sides of the kit.
- Vaping immediately before letting the e-liquid fully saturate the wick.
- Debris or heavy condensation is blocking the automatic draw sensor.
Quick Fix: Remove the pod and check all connections before assuming the device is faulty. Ensure protective materials are removed, and the pod is securely fitted. After installing a new pod, wait one to two minutes before your first puff to allow proper e-liquid absorption.
The Protective Seal Mistake:
If you have missed removing the protective seal or silicone plug, it is one of the most common causes of poor performance. These parts are designed to protect the pod during transport and prevent leakage before use.
If a seal is not removed correctly, e-liquid may not reach the coil properly. This can directly lead to the following:
- Burnt flavour from the first puff
- Weak vapour production
- Poor flavor
- Harsh throat hits
- Inconsistent performance
Misaligned Connections and Blocked Sensors:
The Hayati system features secure magnetic connections between the power source and mesh coils. If the pod isn't fully clicked in, the circuit stays open, causing an error on the LED screen. Dust or lint can block the vacuum sensor; clean the metal pins and blow through the battery base to clear debris. If a terminal chip error persists, you can buy Hayati vapes online for a fresh, premium replacement batch.
Why the Device May Taste Burnt:
The pod was not primed properly:
When a new pod is installed, the cotton wick inside the coil needs time to become saturated with e-liquid. If the user starts vaping immediately, the coil may heat a dry or partially dry wick. This can cause a burnt taste from the first puff; to prevent this, allow the pod to sit for one to two minutes after installation.
E-liquid flow is restricted:
Brunt flavour can also occur when the e-liquid cannot reach the coil efficiently. This may happen if the pod is misaligned, the refill section is not connected correctly, or a seal has been left in place.
Remove the pod and check:
- Pod alignment
- Refill container connection
- Protective seals and plugs
- Airflow openings
- Any signs of blockage or debris
Condensation vs Leaking:
Condensation occurs naturally when vapour cools inside the airflow chamber. It may appear as small droplets around the mouthpiece or airflow area. Normal condensation may include the following:
- Small amount of moisture
- Occasional droplets near the mouthpiece
- light dampness around airflow openings
A genuine leak is usually more noticeable and may include the following:
- Large amounts of liquid
- Continuous seepage
- Sticky residue near pod connections
- Liquid pooling inside or around the device
To reduce condensation and prevent leaking, keep the device upright when possible, clean the mouthpiece regularly, and ensure the pod is installed correctly.
Common Causes of Weak Vapour Production:
Airflow blockage:
Dust, pocket lint, or small particles can block the airflow channels. Cleaning the mouthpiece and airflow openings can help improve vapour production.
Condensation Buildup:
Condensation forms when vapour cools inside the airflow chamber. Wiping the mouthpiece and airflow area can help restore smoother airflow.
Loose Pod Connection:
If the pod is not fitted properly, the device may produce weak vapour or not activate. Removing and reinstalling the pod firmly can often fix the issue.
Flashing LED:
A flashing LED error usually means a low battery, poor pod contact, or e-liquid on the connectors. Charge the device, reseat the pod, and wipe the contacts dry, then test a fresh pod. If it keeps flashing across fresh pods on a full battery, the board has failed, and the device needs replacing.
How to Improve Device Performance and Lifespan:
Store the device upright:
Keeping the device upright helps support steady e-liquid flow and reduces the chance of leakage or flooding.
Keep the airflow area clean:
Check the mouthpiece and airflow channels regularly for dust, lint, or condensation. Clean airflow helps maintain better vapour production.
Prime each new pod:
After installing the new pod, wait one to two minutes before use. This gives the wick time to absorb e-liquid and reduces the risk of burnt hits.
Charge the battery responsibly:
Knowing the proper charging methods for the Hayati Pro Max or Ultra variant can prevent the use of substandard fast chargers or incompatible accessories that could overheat and diminish charging efficiency.
Replace the pod when the flavour ends:
If the flavour becomes weak, harsh, or burnt, the pod may be near the end of its usable life. Replacing the pod at the right time helps maintain a better vaping experience.
Frequently asked question:
How to change Hayati Pro Ultra pods?
Remove the old pod, peel every sticker and bung off the new one, match the colour-coded refills and click them in until the magnets connect. Let it prime for five to ten minutes before vaping. The pods are sealed and non-refillable, so Buy Big Puffs vape Pod Kits online to keep spares handy.
When should I replace my Hayati Pro Ultra instead of changing the pod?
Replace it if there is no LED after trying different cables and a clean port, if it leaks heavily inside, or if it overheats or auto-fires, which are safety issues. Otherwise, the pod is the fault, so change that first, or Buy Hayati Vapes Online with same-day dispatch when the device is finished. For a more detailed look, check out our Hayati Pro Ultra review.
Why is my Hayati Pro Ultra not hitting even when it is charged?
If the battery is charged but the device is not working, the pod is the likely cause. Check it is clicked in firmly and the e-liquid window is not empty, and then wipe the contacts and reseat it. If a fresh pod still gives no vapour, the airflow sensor has likely failed, and the device needs replacing.
Why is my Hayati Pro Ultra not charging?
Charging comes down to the same USB-C basics as how to charge Hayati Pro Max devices, so use a proper 5V wall plug, not a laptop port or fast charger, and clean any lint from the port. If there is still no light, leave it for twenty minutes to wake, and never charge it overnight, in line with UK battery safety guidance.

